Grease that clings after a hundred roasts can make good pans look tired. I wanted the shine back without harsh fumes, so I tried a method that favors patience over force. The routine is calm, quick to set up, and kind to metal. It lifts dull film, then leaves a soft glow that feels brand-new. My baking sheets went from blotchy to bright in one quiet session, and the steps are easy to repeat.
Why this restores baking sheets without harsh chemicals
Grease stains seem baked in, yet residue bonds can soften when moisture and time work together. Start with a clear goal: refresh the surface, not erase every mark of use. Gather basics before you begin so momentum never stalls and the sequence stays steady from first sprinkle to final rinse.
You’ll need:
- Baking soda
- Hydrogen peroxide
- Spray bottle
- Scrubber sponge
- Steel wool (optional).
Keep gloves nearby, plus good light to spot lingering haze on edges and corners. Because this process targets set-on film, not structural damage, expect gradual change and avoid rushing steps that rely on patient contact time.
Most pans are aluminum. Some are uncoated, others nonstick or enamel-clad. Treat uncoated metal differently from coated trays to protect delicate surfaces. The method here suits sturdy, uncoated pans and gently maintained nonstick; check manufacturer guidance when uncertain, and test a corner on older baking sheets first.
Step-by-step layering that loosens stubborn, baked-on residue
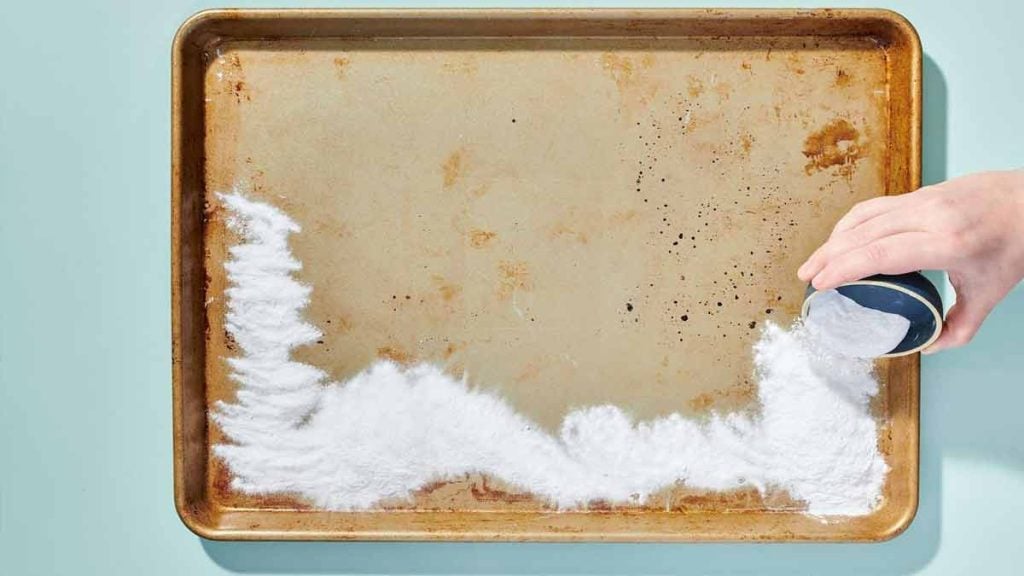
Begin with a dry pan, so powder spreads evenly. Shake on a generous blanket of baking soda, focusing on dark patches and greasy corners. This mild alkali lifts polymerized oil as moisture penetrates, which means less scraping and fewer scratches on the metal of your baking sheets later.
Transfer hydrogen peroxide into a clean spray bottle. Mist until the surface looks uniformly damp, not flooded, letting bubbles form quietly across the powder. The fizz signals work in progress, as oxygen helps loosen grime while the slurry clings to vertical lips and reaches patterned ridges.
Add another thin snow of baking soda, then spritz again to complete the stack. That second pass refreshes active surfaces and extends contact at the worst spots. Edges and underturned rims often trap stubborn film, so sweep the spray there deliberately before setting the pan aside to rest.
Timing, patience, and safe handling for brighter baking sheets
Let the pan rest undisturbed for at least four hours, and up to overnight when buildup is heavy. Contact time matters more than force here, because grime softens slowly as the slurry stays moist. Covering the pan loosely helps retain moisture while you leave the kitchen to do something else.
Avoid leaving the mixture indefinitely. Extended exposure can dull bare aluminum through oxidation, especially if the surface already shows wear or pitting. Gloves protect skin during cleanup, and a ventilated space keeps things comfortable while the active foam quietly breaks bonds without harsh fumes or strong scents.
If liquid dries at the edges, mist lightly to rehydrate before scrubbing so grit lifts cleanly. Keep expectations realistic: cosmetic tint may remain, yet cooking performance won’t suffer on older baking sheets that heat evenly. Focus on sanitation and shine, allowing honest patina to stay wherever it doesn’t affect release.
Scrub, rinse, and finish gently to protect the metal
When time is up, lift the paste with a scrubber sponge using short, firm strokes. Rewet the sponge as needed so dried powder releases without gouging. Work from the cleanest zones toward the worst, pushing slurry away so fresh grime doesn’t wash back across recently brightened baking sheets surfaces.
Rinse thoroughly with warm water, then check under the rim and tight corners. Where stains remain, repeat light scrubbing and refresh a small patch of paste for local spot treatment. Patience beats pressure here; gentle abrasion preserves thickness and keeps edges from rounding during heavy-handed effort.
If a few marks survive, buff only those spots with extra-fine steel wool. Use the lightest touch, wear gloves, and stop as soon as color evens. Over-scrubbing removes metal, so treat steel wool like a last step for isolated specks rather than a broad resurfacing pass.
Smart prevention and upkeep, so cleaning stays quick next time
Line trays when you can. Parchment or foil catches drips from oily marinades and sugary glazes, reducing baked-on film dramatically over time. Silicone mats add reusable convenience, protect surfaces from stains, and release roasted vegetables easily so seasoning sticks to dinner, not to the pan itself.
After cooking, scrape crumbs, then wash by hand with warm, soapy water. Dishwashers can discolor aluminum through harsh detergents and heat. So gentle sink care maintains appearance. Dry immediately to avoid water spots at the rim and corners, and store pans nested with a towel to prevent scuffs.
Set realistic expectations and choose tools accordingly. Heavy-gauge aluminum resists warping and cleans predictably; nonstick needs milder handling and soft pads to last. Used consistently, these small habits keep baking sheets brighter longer and reduce how often deep soaks are needed after busy weeks of cooking.
A simple routine that saves time and money
Shiny results come from uncomplicated steps done patiently. Layer, wait, scrub, and finish lightly, and those familiar trays look renewed without special gear or harsh scents. The process respects metal, saves replacements, and restores pride in tools you use every week. With small habits between roasts, baking sheets stay cleaner, deep refreshes get easier, and routine maintenance turns into a quick ritual rather than a lingering chore. Small wins add up in every busy kitchen.